
Do you actually need an app?
Publishing augmented reality does not require an app store. You can upload the 3D model and get a link that opens AR straight in the phone browser — no Unity, no build, no Google review. If your case is showing a product, a part or a project, that route is far shorter than the one in this tutorial.
Build for publication:
If you are developing an app with Unity, you will need to configure a few options before publishing.
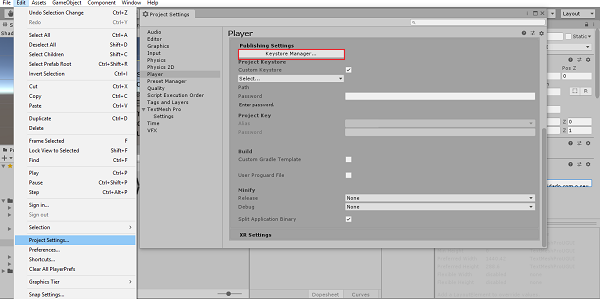
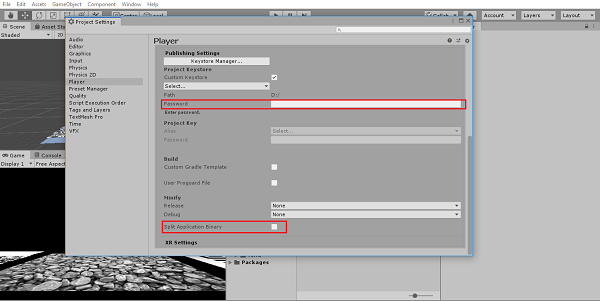
Go to Project Settings > Publishing settings and click on Keystore Manager.
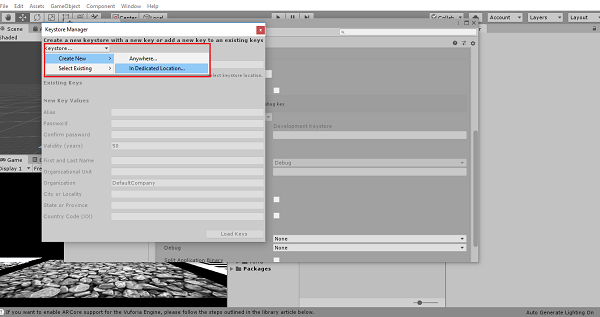
Then click on Keystore > Create new > In dedicated location. Choose a location and name to save your key — make it easily accessible and memorable, as this key is critically important for publishing your app and without it you will not be able to submit future updates.
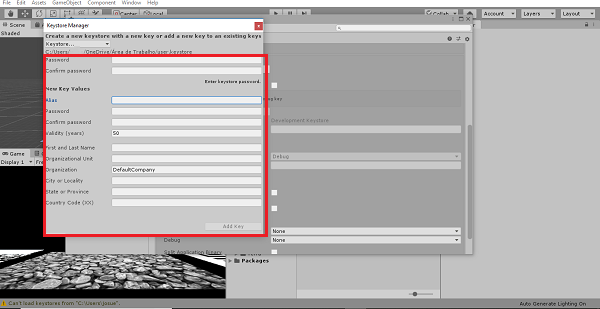
Next, set a password for your key. It is essential that you keep this password safe for future updates. Confirm the password, enter the same name you used to save your key in the alias field, then type the password two more times. Fill in your name, organization name if applicable, city, state, and country code (55 for Brazil), then click "add key".
With the key created and selected, enter the password you created in the Publishing Settings tab. If your app exceeds 200 MB in size, enable the "split application binary" option — Unity will then generate an expansion file for you to upload alongside the APK on Google Play, as they do not accept APK files larger than 200 MB.
Making the app compatible with 64-bit devices
As of August 2019, all apps on Google Play must be compatible with 64-bit devices. 64-bit devices deliver faster and higher-performance experiences. Making your app compatible is straightforward, though it will increase the app's file size slightly.
Your Unity version must be 2017.4 or later, as earlier versions do not support this change.
Go back to Player Settings, then to Other Settings > Configuration. Under "Scripting Backend", select IL2CPP, and under "Target Architectures", check the ARM64 option.
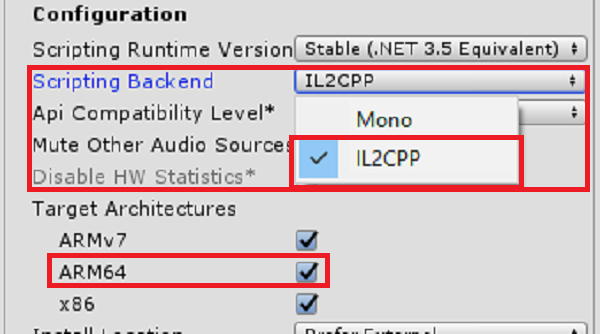
After completing this step, proceed with the build as usual via Build Settings > Build, select the output location, and click Save.
How to publish your app on Google Play
Now that your app is ready for publication, you will need a Google account configured as a developer account. The developer account is created from a standard Google account and costs 25 USD. To create one, go to the Google Play Console website, sign in with your Google account, or if already signed in, follow the on-screen instructions.
Scroll to the bottom of the page, accept the developer agreement, and click Continue to payment.
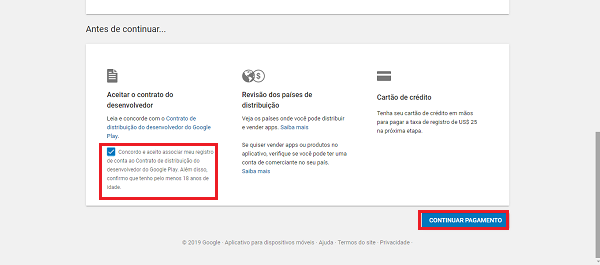
Enter your payment information (credit card) and complete the purchase.
After payment, you will be directed to the "Account details" page, where you will need to provide personal information such as your address, among other details. Once complete, you will have access to your developer account and will be able to publish your app.
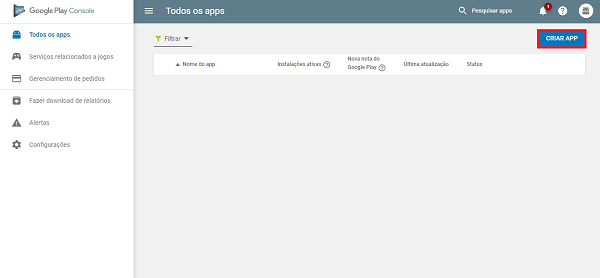
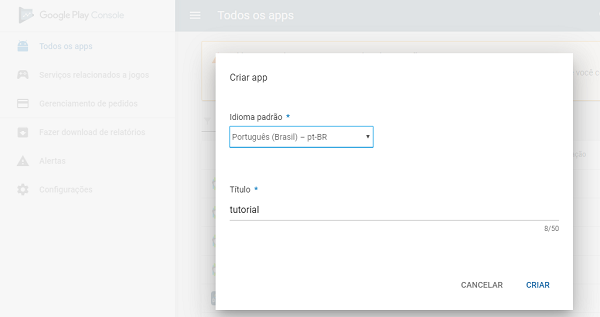
On your account's home screen, click the "Create app" button.
Enter your app's name and language.
In the Product Details tab, the following fields are required:
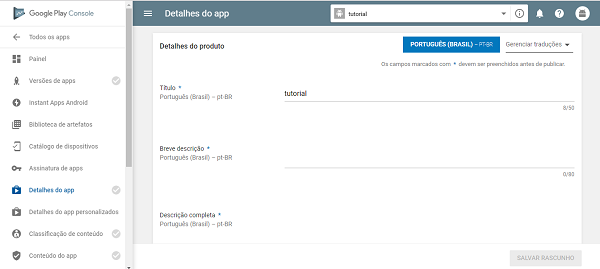
- A short description of your app;
- Full description (longer and more detailed);
- Your app's high-resolution icon (512×512);
- Screenshots so users can see what the app looks like (minimum 2, maximum 8);
- Feature graphic — an image displayed as the "background" of your app's listing on Google Play, serving as a promotional banner;
- Select your app type (apps or games);
- Category (Art, Shopping, Weather, etc.);
- Contact email;
- Privacy policy: This is an agreement between the developer and the user in which the user consents to the app accessing personal data such as the camera, microphone, contacts, and so on. There are websites that generate a privacy policy automatically — simply fill in your app's characteristics and you will receive a link to the policy, which can then be added to your Google Play listing.
Optionally, you may also add to your app's details:
- 360° image;
- YouTube promotional video;
- Website;
- Phone number;
After filling in all the fields above, the only remaining item under Product Details will be the content rating, which defines the age group of users who can access the app. However, you must first upload the APK, so let us now cover the different app version tracks.
App versions:
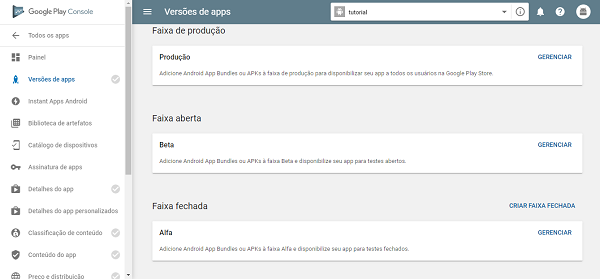
To publish your app, there are several testing tracks as well as the final release track:
- Internal testing track: Makes the app available for quality assurance testing within minutes;
- Closed track (Alpha): Invite a larger group of trusted testers to try your app before launch;
- Open track (Beta): Open testing with a broad user base who can access the app via a link or the store, where it will appear as "app in testing".
- Production track: The final release, making the app available to all Google Play users;
Once you have selected the desired release track, click Create release.
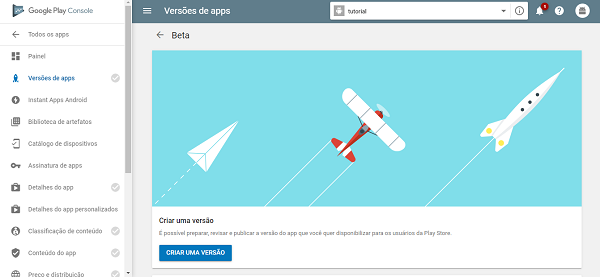
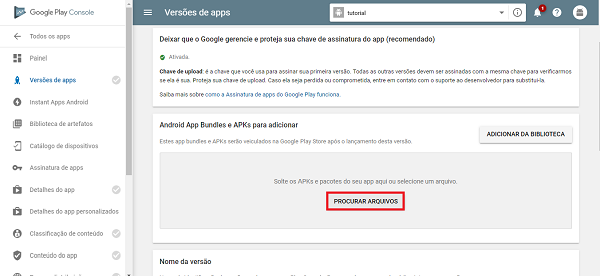
Accept Google's terms for app signing key protection. You will then see "Android App Bundles and APKs to add" — click Browse files, navigate to your APK directory, and add the file. If you have an expansion file (.obb), add it here as well.
Content rating:
After selecting the release track and uploading your app, click on Content rating and complete the questionnaire about your app. Google Play will then generate the appropriate rating for it.
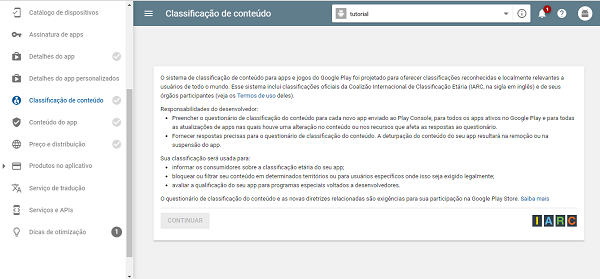
If you wish to change your answers after completing the questionnaire, simply return to the same page and click "Edit".
Pricing and distribution:
In the Pricing and distribution section, select the option that applies to your app: paid or free. Note that once published as free, an app cannot be changed to paid.
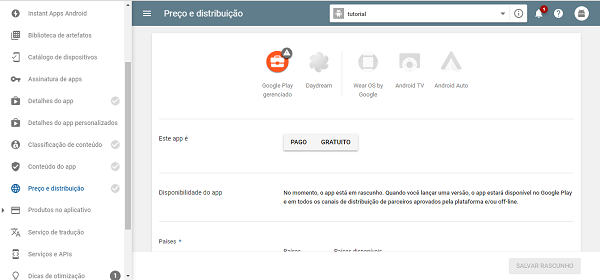
Also select the countries for distribution, indicate whether your app contains ads, and review any additional distribution preferences.
App content:
Finally, after completing the content rating questionnaire and indicating whether your app contains ads, go to the App content tab and select your app's target audience. If the app is intended for children, review the guidelines of the "Designed for Families" program that will be presented, to ensure you are not in violation of any rules. Alternatively, select "App not designed for children".
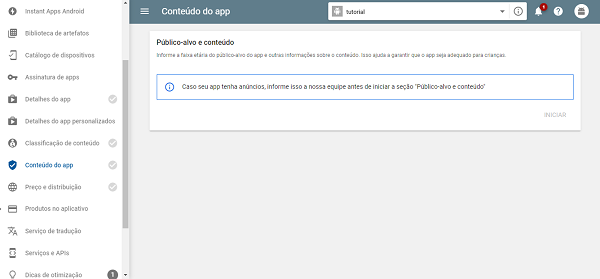
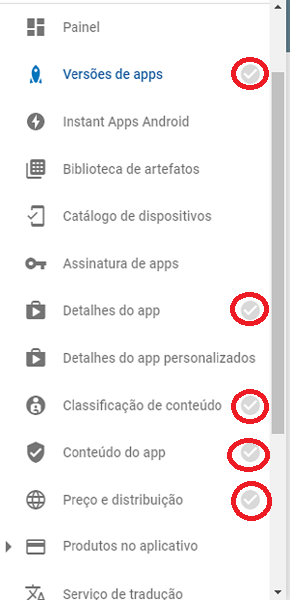
To publish your app, it is important to complete all the requirements listed above. Once done, you can submit your app to the store through the "App versions" section. You can verify whether all information has been filled in correctly by checking the icons next to each section name — they will turn green when complete.
Google Play Console also provides a detailed help page covering common questions about publishing, which you can access at:
https://support.google.com/googleplay/android-developer#topic=3450769